
19 Feb 2012

27 Jan 2012


11 Jan 2012


5 May 2011
Hole reparing
Repair and re-surfacing
For the repair, the first survey should be done. The yacht carefully examined and tested in the main strength members, the hull, deck, and cabin arrangement. Generally, the probing is performed with hammering and visual inspection then estimates the condition. The hull is composite construction, for instance, inner laminate total thickness is 2.5 mm the foam core is 12mm and the outside laminate total thickness is 3mm, the fiber is E-glass. The surrounding damage is small, for instance, 50mm. Therefore, its repair area is 1000mm x 400mm. The damaged area should be marked ellipse shape of the circle with pencil. The circle should be covered 1000mm x 400mm.
Before the cutting damage area, the scarfing area also should be considered that is 30:1. The ellipse-circle should be bigger than the first estimation since inner-skin is 2.5mm and outer skin is 3mm, therefore, the inner-skin, core, and outer-skin have different diameter, 1000mm x 400mm, 1150mm x 550mm and 1150mm x 550mm, respectively. The ellipse-circle could be cut out with diamond-cutter, nicely.
Before the laminating, foam core and fibers should be prepared with proper size, especially, each fiber is different size because of scarfing. To prepare the fibers, be aware of that Inner-skin and outer-skin size also different.
Fig 1 Preparing the fibers (ABS, 2006)
By the (ABS, 2006), the new core will need to be slightly thinner than the existing core to accommodate the additional repair laminate thickness, or the core can be make holes to squeeze out the glue. The outer-skin is 3mm thickness, it will scarf 90mm. back-plate is also prepared for the inner-skin laminating.
Laminating starts from the inner-skin, core, and then outer-skin, sequentially. For the inner-skins laminating, back-plate will be attached temporally behind the inner-skin then layer up fibers until fit proper thickness. Butt joint method is used for the foam core, before the joint, glue should be applied on the inner-skin then joint with old foam core. The last step, outer-skins are applied on the core. For the less labor, the peel-ply can be applied on the laminated skin.
The surface should be prepared for the painting. After peel-ply strip off from the surface, there are some shining parts which should be sanded and dusted the surface off. When sanding the surface, the glass should not be damaged.
The painting process is the same as the case study 6.
Haul-out
Haul-out process:
Haul-out with the travel-lift, generally, a travel lift which is a metal frame and sling the lift belts. It is mounted on wheels, the lift moves into position and the belt lowered under the yacht-hull. The yacht is hanging over the belts and lifted out of the water, and moved onto the cradle in a trailer. For the safe, the yacht should be carefully distributed the load between two belts to avoid from damages.
There are two approach methods, either bow first or stern first (Haulout and relaunch guide, n.d). Before approaching to the travel lift, the lift drive should know which approaching. It is important to the travel lift driver because its lifting belts vary and set up properly with each method. Also, the lift driver should know the lifting position of the boat. The lifting positions are determined by the skipper who indicates the direction, the lifting belt should move to ensure it is correctly placed by the lift driver (Haulout and relaunch guide, n.d).
For the bow-first approaching, the yacht slowly enter in the centre of the pen (Haulout guide, n.d,). The travel lift driver will slowly bring belts. Yacht’s engine should keep running with neutral gear and the skipper also stays in the helm until the engine turned down, advised by lift driver (Haulout and relaunch guide, n.d). The yacht will be gently held by the forward belt until the aft belt has been placed. The lift driver will adjust with necessary.
For the stern-first approaching, the yacht should enter stern first in the centre of the pen (Haulout guide, n.d). Before entry, the backstay of the yacht may be removed. The lifting aft position will be on the lifting point with first belt. The lift driver, then, placed the second belt at the forward lifting position.
The lifted yacht move on to the bilge cradle which is proper for the above waterline repair. As Fig 1, the cradle is ready on the haulage trailer, if the workshop is far from the ramp.

Fig 1 Bilge cradle on the haulage trailer
The yacht placed on the proper cradle, the position could be adjusted with the height of cradle bars as shown in Fig 2.

Fig 2 Adjust the cradle bars
The yacht should be secured on the cradle then move to the factory for repairing as shown in Fig 3.

Fig 3 Moving the yacht with haulage trailer
The yacht is placed in the factory with the bilge cradle as shown Fig 4.
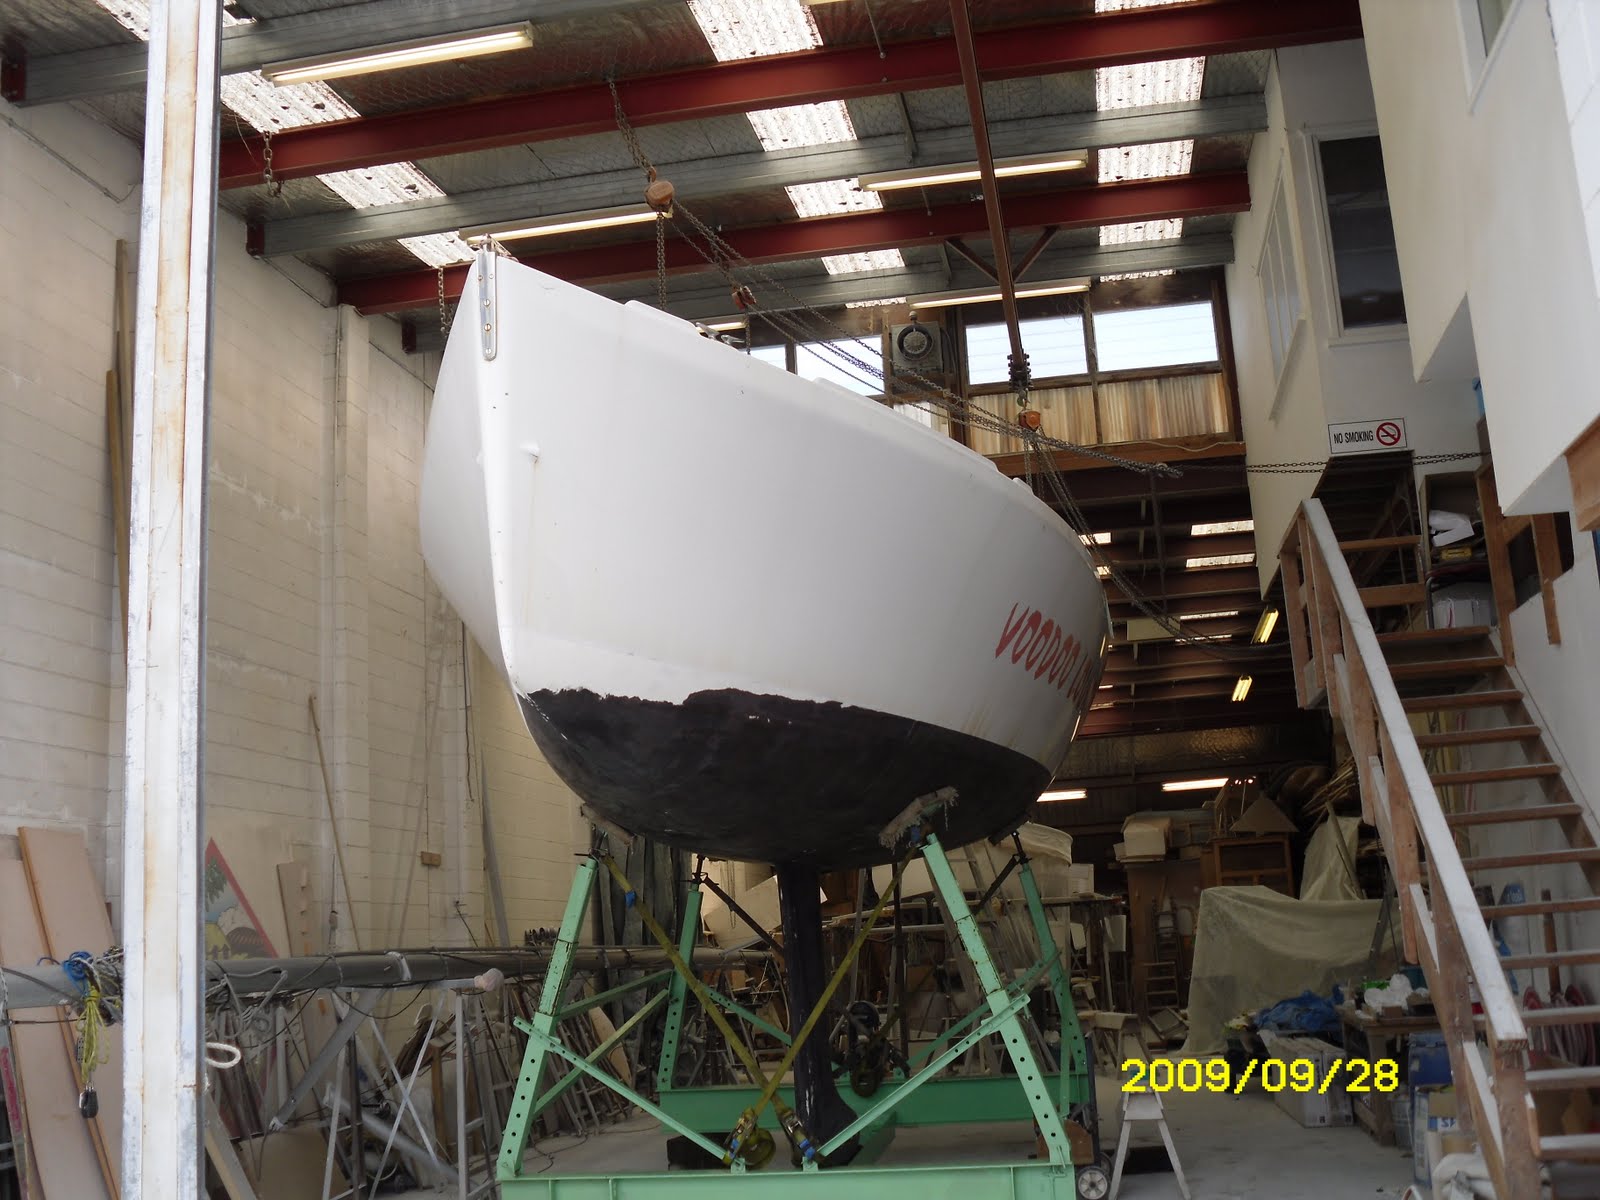
Fig 4 Yacht is in the factory on the bilge cradle
Re-launching
For the re-launching the yacht, it should move to the ramp with haulage trailer. The process is the reverse way to the haul-out processes. When the yacht has been returned to the water the engine will start. The yacht can move advised by lift driver, the lifting belt should be lowered below than the keel and rudder.


Subscribe to:
Posts (Atom)